A solar garden light that once glowed until dawn may now fade after an hour. Before opening it, check that the panel is clean and receives several hours of direct sunlight. Shade and dirt can mimic a failing battery. If the light still performs poorly, learning how to replace the battery in a solar garden light may restore its normal runtime.
This guide explains how to inspect the light, open its battery compartment, and choose a compatible rechargeable replacement. Small details matter: battery chemistry, voltage, size, and polarity must match the manufacturer’s instructions. Do not assume every solar light uses the same cell. Some covers are held by tiny screws; others have clips that can crack if forced. Work on a dry surface, and stop if the battery is swollen, leaking, or badly corroded. That is not a part to handle casually.
Take a photo before removing the old battery. It can help you remember which end faces each terminal. Use the light’s manual or label to confirm the specification, then follow local guidance for battery disposal. The repair is often simple, but not always. A damaged panel, switch, or internal connection may be the real problem, so replacing the battery cannot guarantee a fix.
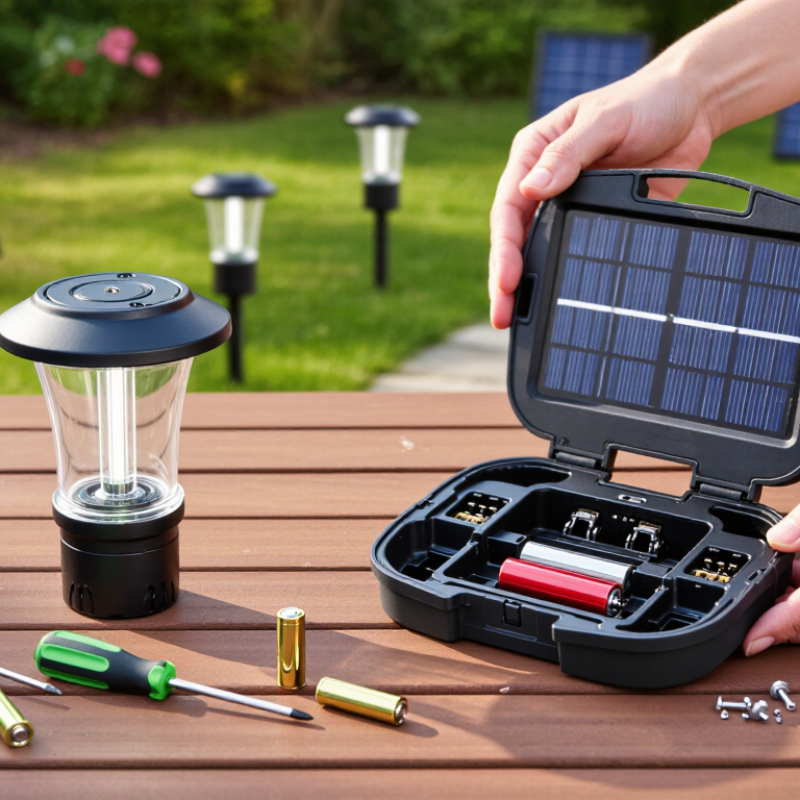
Understanding the Battery and Its Compatibility Requirements
A solar garden light may use one AA-size, 1.2-volt rechargeable cell. NiMH is common, but designs vary. Check the old cell and the light’s label for chemistry, voltage, size, and capacity in milliamp-hours. IEC 61951-2:2017 specifies a 1.2-volt nominal voltage for sealed NiMH cells. That figure is a useful check, not proof of compatibility. Match the chemistry, too: a light’s charging circuit may be designed for NiMH and not for lithium cells. Similar shapes can hide important differences. I still check twice; labels can be tiny.
Capacity matters as well. A higher mAh rating may provide longer evening operation, but the small solar panel may need more daylight to recharge it fully. Use the same capacity range recommended on the light or old cell when possible. Before fitting the replacement, compare its length and diameter, then check the plus and minus marks against the contacts. A loose fit can interrupt power. If the lamp has a removable cover, keep its seal clean and seated; rain can reach a poorly closed compartment. After installation, place the light in direct sun for a full day, then check whether it switches on at dusk. If it stays dim, shade, dirty panels, or tired contacts may be the cause—not necessarily the new battery.
Preparing the Light and Tools for Safe Battery Replacement
Before opening a solar garden light, lift it from the soil and move it to a dry, well-lit work surface. Turn its switch off, if it has one. Let the light sit in shade for a few minutes; a warm casing is awkward to handle. Gather a small screwdriver that fits the screws, a clean cloth, and a shallow tray for loose parts. Tiny screws disappear easily.
Check the light’s instructions or markings before choosing a replacement. Many garden lights use rechargeable batteries, and the required chemistry, voltage, and size can vary. Do not assume an ordinary disposable battery is suitable. Keep the replacement nearby, but leave it packaged until you have confirmed the specifications. A second look helps. It is easy to mistake a faded label for a familiar battery type.
Wipe away loose dirt before removing the cover, so grit does not fall into the compartment. If you see moisture, swollen cells, or crusty residue, avoid touching the battery with bare hands. Wear gloves, and stop if the compartment looks badly damaged; cleaning it may cause more harm. Note the battery’s orientation before removal, or take a quick photo. The tiny plus and minus marks can be hard to see. Set the screws in the tray, and work gently rather than forcing a stuck cover.
How to Replace the Battery in a Solar Garden Light? - Preparing the Light and Tools for Safe Battery Replacement
| Preparation Item |
What to Check or Gather |
Why It Matters |
Safe Handling Tip |
| Solar light and battery compartment |
Move the light to a dry, well-lit work surface. Locate the battery cover and check how it is secured. |
A clean, stable workspace makes small screws and battery contacts easier to inspect. |
Switch the light off if it has an on/off switch, and avoid working with wet hands or on a damp surface. |
| Replacement battery |
Read the markings on the original battery or in the light’s instructions. Match the required size, voltage, chemistry, and terminal arrangement. |
Solar lights commonly use rechargeable NiMH cells; some models specify another type. The correct specification depends on the light. |
Do not substitute a non-rechargeable alkaline battery unless the manufacturer explicitly says it is suitable for that model. |
| Small screwdriver |
Choose a screwdriver that fits the battery-cover screw head securely. |
A well-fitting tool helps prevent stripped screws and damage to the cover. |
Apply gentle pressure and keep the screwdriver away from the battery terminals. |
| Soft, dry cloth |
Use it to wipe dirt from the outside of the light and around the battery compartment. |
Removing surface dirt helps keep debris out of the compartment when it is opened. |
Do not pour water into the open compartment or use a wet cloth on the battery contacts. |
| Battery and contact inspection |
Look for corrosion, damaged wires, loose contacts, swelling, or leakage before installing a new cell. |
Visible damage may indicate that the light needs repair or careful cleaning before it can work properly. |
If a battery is leaking or damaged, avoid touching the material directly and follow local battery-safety guidance. |
| Polarity and compartment markings |
Note the positive (+) and negative (−) symbols before removing the old battery. |
Correct polarity is needed for the light’s charging and operation circuits. |
Install the replacement according to the compartment markings; never force it into place. |
| Battery recycling plan |
Set aside the old rechargeable battery for an appropriate battery collection or recycling point. |
Rechargeable batteries should be handled through suitable collection routes rather than assumed to be ordinary household waste. |
Keep the old battery away from metal objects that could bridge its terminals, and follow local disposal rules. |
Opening the Solar Light and Removing the Old Battery
Move the solar garden light to a dry, well-lit work surface and switch it off if it has a switch. Let it cool if it has been sitting in strong sunlight. Check the housing for small screws, often beneath the cap or around the battery compartment. Use a screwdriver that fits snugly; a loose fit can strip the screw head. Keep the screws in a small dish. Once they are out, separate the cover slowly along its seam. A plastic opening tool can help, but do not force the casing or pull on wires. Some housings open more easily than expected; others feel stubborn.
Look for the battery and note its size, chemistry, and polarity markings before removing it. A quick photo can help you remember how the plus and minus ends sit. Lift the battery gently, using its holder rather than tugging at nearby wires. If it is held by a spring contact, ease one end free without bending the metal. Check the compartment for dampness, rust, or white residue. Wear gloves if you see leakage, and avoid touching the material directly. If the compartment is badly corroded or a wire is damaged, stop and have the light assessed instead of prying further. It is easy to rush this part. I would rather pause and check the markings again than guess which replacement battery fits.
Installing the Replacement Battery and Reassembling the Light
With the old battery removed, check the label inside the compartment before fitting a replacement. Match its chemistry, voltage, size, and polarity; a cell that fits physically may still be electrically unsuitable. Many garden lights use a rechargeable NiMH cell. IEC 61951-2 specifies a nominal voltage of 1.2 volts for NiMH cells, a useful reference when checking the original battery. Do not swap in a higher-voltage cell unless the light’s instructions explicitly allow it. Keep it dry. If the contacts look green or crusted, clean them gently with a dry cloth, not a wet one.
Place the replacement with its positive and negative ends aligned to the markings. The spring contact can make this awkward, so avoid forcing the cell or bending the metal. Close the compartment firmly, making sure the gasket sits flat and no wire is pinched. A misaligned seal is easy to overlook; rain may later reach the battery contacts. Reassemble the cap and lens in their original order, then set the light in direct sunlight for a full charge. Test it after dusk, or briefly cover the solar panel to trigger the sensor. If it stays dark, reopen the compartment and check polarity and contact pressure before assuming the new battery is defective. One caveat: some lights have sealed or soldered battery packs, and those are better handled according to the manufacturer’s service instructions.
Testing the Light and Disposing of the Old Battery Properly
After fitting the replacement battery, check that its polarity matches the markings inside the compartment. Make sure the contacts are dry and free of dirt, then close the cover securely. Place the light in direct sunlight for several hours before testing; a fresh battery may still need charging. At dusk, switch the light on or cover the solar panel to simulate darkness. Wait a little. It is easy to blame the new cell too quickly. If the lamp stays dark, recheck the switch, battery position, and contact springs before assuming another part has failed.
Remove the old battery and identify its chemistry from the label, such as alkaline, nickel-metal hydride, or lithium. Disposal guidance varies by battery type and location, so check your local waste or recycling service for an appropriate collection point. Don’t put a damaged or leaking battery into a household recycling container. Avoid touching any leaked material; follow local guidance for safe handling and disposal. Keep loose batteries away from metal objects, which can bridge the terminals. A small detail, but an important one. Store the old cell somewhere dry and out of children’s reach until you can take it to a suitable collection point.
How to Replace a Solar Garden Light Battery
Check the old battery’s chemistry and voltage before choosing a replacement. The chart shows typical nominal voltages for common rechargeable cell types; these are reference values, not battery test thresholds.
After installing a compatible battery, place the light in direct sunlight for a full day, then check whether it illuminates after dark. Recycle the old rechargeable battery through a local battery collection or household hazardous-waste program; follow local guidance for handling and terminal protection.
Conclusion
This guide explains how to replace the battery in a solar garden light safely and effectively. It begins with identifying the battery type, voltage, size, and chemistry required by the light, since a replacement must be compatible with its charging system. Before starting, switch off the light if possible, work in a dry, well-lit area, and gather suitable basic tools. Taking care during preparation helps prevent damage to the light and makes the process easier.
Next, open the light’s housing carefully, noting how its parts fit together, and remove the old battery without pulling on its wires. Insert a compatible replacement with the positive and negative ends aligned correctly, then secure the battery and reassemble the housing so it remains protected from moisture. Place the light where its solar panel can receive direct sunlight and test it after charging. Finally, dispose of the old battery through an appropriate battery collection or recycling service rather than putting it in ordinary household waste.

 Zeteo Light