Solar garden lights brighten our outdoor spaces and create a welcoming atmosphere. Over time, however, the batteries in these lights can lose their efficiency. This leads to dimmer lights or, in some cases, complete failure. Knowing how to replace the battery in a solar garden light is essential for maintaining their functionality.
Replacing the battery may seem daunting, especially for first-timers. Yet, with the right tools and knowledge, it can be a straightforward task. Most solar garden lights use rechargeable batteries, which can be easily found online or at local stores. You just need to find the right type to match your light.
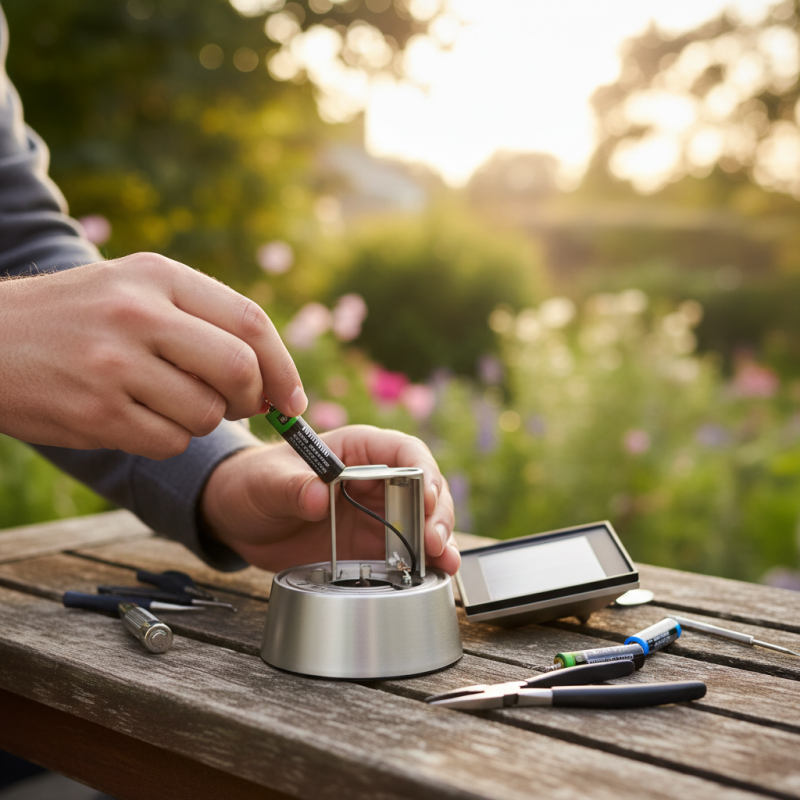
When you replace the battery, pay attention to the installation process. Ensure the connections are secure to avoid future problems. While it may take a few tries to get everything right, the satisfaction of brightening your garden again is worth the effort. Let's explore the steps involved in this important and rewarding task.
Solar garden lights consist of several key components that contribute to their functionality. At the core of these lights is a photovoltaic solar panel. This panel captures sunlight and converts it into electricity. A report by the U.S. Department of Energy indicates that effective solar panels can convert up to 20% of sunlight into usable energy. In regions with strong sunlight, this can significantly enhance the efficiency of solar lights.
Another essential component is the rechargeable battery. Typically, nickel-metal hydride (NiMH) batteries are used. These batteries store energy generated by the solar panel for later use. According to research from the National Renewable Energy Laboratory, improper battery maintenance can reduce lifespan by up to 50%. Many users overlook this aspect, leading to underperformance of their solar lights. Regularly checking the battery's condition can prevent such issues.
Finally, the LED bulb acts as the light source. LEDs are preferred for their energy efficiency. They use less energy and have a longer life compared to traditional bulbs. A common misconception is that all LED bulbs are the same. In reality, the quality can vary greatly. Opting for high-quality LEDs ensures brighter and longer-lasting illumination. Reflecting on these components is crucial for optimal functioning of solar garden lights.
When it comes to replacing the battery in a solar garden light, identifying the right replacement is crucial. Most solar lights utilize rechargeable batteries, typically nickel-metal hydride (NiMH) or lithium-ion types. According to a study by the International Renewable Energy Agency, around 70% of solar light users face battery-related issues due to improper replacements. Choosing the correct type ensures optimal performance and longevity.
To start, check the voltage and capacity of your current battery. Common sizes include AA and AAA, with voltages of 1.2V or 3.7V for lithium-ion. Misunderstanding specifications can lead to underperformance. For instance, using a battery with lower voltage than required may result in weak illumination. User reports indicate that improperly rated batteries shorten lifespan. Battery chemistry influences charging cycles as well. NiMH batteries are often cheaper but may not hold up as well as lithium-ion equivalents in the long run.
Consulting product manuals or online resources can be valuable. Many users overlook the importance of battery conditions, too. Sometimes, a slight corrosion on terminals leads to poor connections. Regular maintenance can prolong the life of new batteries, but many forget this simple step. It's essential to monitor performance after replacement to determine if the right choice was made. Understanding these details can significantly improve your solar light's functionality.
When replacing the battery in solar garden lights, proper tools and materials are essential. You’ll need a few basic tools. First, a screwdriver is necessary for removing the light's casing. A pair of gloves will protect your hands while handling batteries. Additionally, a voltmeter can help you check the battery's charge level.
Battery types for solar lights vary, but common options include NiMH and Li-ion batteries. Most garden lights use rechargeable types. According to industry data, around 65% of solar lights work best with NiMH batteries due to their efficiency and longevity. When selecting new batteries, ensure compatibility. Check the voltage rating and size.
Gathering these materials facilitates a smooth replacement. Don’t rush the process, as incorrect handling can lead to damage. Ensure you have a well-lit working area. Regular maintenance can extend the life of the solar lights. Reflect on common issues, like buildup on solar panels, which can affect battery performance. This practice enhances the sustainability of your outdoor lights.
Replacing the battery in your solar garden light doesn't have to be daunting. Follow this step-by-step guide to ensure success. Start by gathering your supplies: a replacement battery, screwdrivers, and gloves. Wear gloves to protect your hands. Check the specifications of your solar light to select a compatible battery.
Carefully remove the top cover using a screwdriver. You may need to be gentle, as some screws can be delicate. Once open, locate the old battery. Take note of its orientation for proper installation of the new one. Disconnect the old battery from its terminals. This part can be tricky; ensuring the connections are secure is crucial for optimal performance.
After removing the old battery, place the new one in the same orientation as the old one. Ensure the terminals are correctly aligned and attached. Before closing, give your garden light a test. It should turn on if everything is done right. If not, double-check the connections.
Tips: Rechargeable batteries may not last forever. Regularly monitor their performance. You might find yourself replacing them more often in frequently used lights. Also, consider checking the solar panel for dirt or obstructions. Clean panels help increase efficiency.
After replacing the battery in your solar garden light, proper testing is crucial. Start by placing the light in a sunny area. Ensure it gets plenty of sunlight throughout the day. This will help charge the new battery efficiently. Remember, if the light doesn’t seem to brighten at night, it may indicate a deeper issue.
Maintenance is equally important. Regularly check for dirt and debris on the solar panel. Cleaning it with a soft cloth can significantly improve performance. You may also want to inspect the wiring for any signs of wear. Sometimes, these details get ignored. Yet, they can make a major difference.
Keep an eye on the light's performance over time. If the brightness starts to fade again, reflect on how the light has been used and maintained. Were there long periods without sunlight? Has the battery been replaced too many times? These questions can lead to better care practices. In the end, a little attentiveness goes a long way in ensuring your solar garden light remains functional and efficient.
: Most solar lights use rechargeable NiMH or lithium-ion batteries.
Check the voltage, capacity, and size of the current battery for compatibility.
Using a lower voltage battery can lead to weak illumination in your solar light.
A screwdriver, gloves, and a voltmeter are essential for the replacement process.
Regular maintenance, like cleaning connections and panels, can improve battery lifespan.
Disconnecting can be tricky; secure connections are crucial for optimal performance.
Noting the old battery's orientation ensures proper installation of the new battery.
Regularly check performance, especially in lights that are frequently used.
Buildup on the solar panels can hinder battery performance and overall efficiency.
Double-check the connections to ensure they are securely attached and correctly aligned.
Replacing the battery in a solar garden light is an essential maintenance task that can significantly extend the lifespan and efficiency of your outdoor lighting. To begin, it’s important to understand the components of your solar garden light and identify the correct replacement battery suited for your model. Gathering the necessary tools and materials will streamline the process, making it more efficient.
The step-by-step guide laid out offers clear instructions on how to replace the battery in a solar garden light easily. After successfully replacing the battery, testing the light ensures it functions correctly. Regular maintenance is also crucial to keep your solar garden light operational for years to come, allowing you to enjoy its ambiance and utility in your garden.
Zeteo Light